

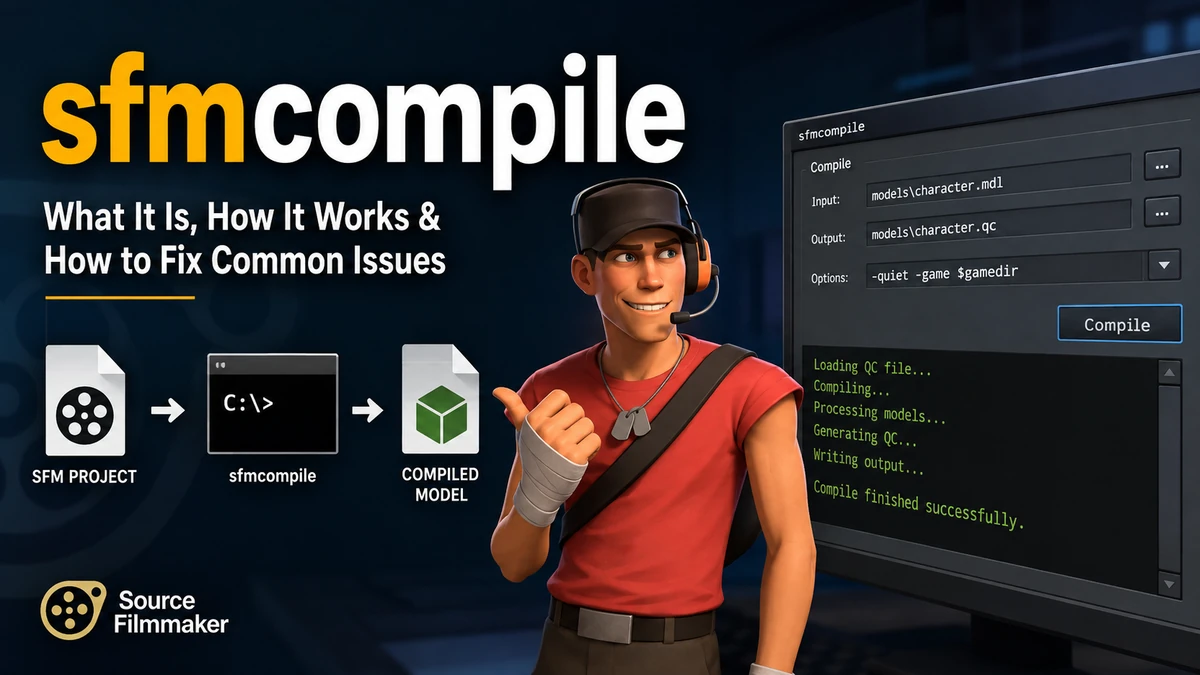
A custom model can look perfect in Blender and still appear invisible, broken, untextured, or frozen in Source Filmmaker. The missing step is often compilation. sfmcompile is the workflow that converts source assets into formats Valve’s Source engine can actually load.
sfmcompile is the process of preparing Source Filmmaker assets—such as models, animations, textures, and maps—and converting them into Source-compatible files. For models, this commonly means combining SMD or DMX files with QC instructions and compiling them into MDL-related files using StudioMDL or tools such as Crowbar.
Understanding this process is especially useful when importing custom characters, props, rigs, animations, or environments rather than working only with assets already supplied with Source Filmmaker.
This guide explains what the process actually does, which files and tools are involved, how to compile a model from start to finish, and how to diagnose the errors that cause most failed imports.
What Is sfmcompile and Why Does SFM Need It?
Source Filmmaker is Valve’s movie-making software built around the Source engine. The original Source Filmmaker uses a Source-engine branch, while Valve also has Source 2 filmmaking tools associated with products such as Counter-Strike 2, Dota 2, Half-Life: Alyx, and SteamVR Home Workshop Tools.
That distinction matters because the classic Source Filmmaker asset pipeline does not work like a modern drag-and-drop 3D application.
You normally cannot take an arbitrary .blend, .fbx, or similar modeling file and expect classic SFM to understand it directly. Instead, the asset must pass through intermediate Source formats and then be compiled.
For a model, the workflow looks roughly like this:
3D application → SMD/DMX → QC script → StudioMDL/Crowbar → MDL package → Source Filmmaker
Valve describes StudioMDL as the command-line utility that converts intermediate model formats exported by modeling packages into the binary .mdl format read by the Source engine.
Compilation therefore acts as the bridge between your editable source files and the files the engine expects.
What compilation can prepare
Depending on what you are creating, compilation may involve:
- character and prop models
- skeletal animation
- model sequences
- collision meshes
- custom materials
- texture references
- map geometry
- lighting information
- physics data
One point that often causes confusion is that model compilation, texture preparation, map compilation, and movie rendering are not the same operation.
Some online guides use “compile” broadly enough to include exporting a finished SFM animation. In Source development terminology, however, model compilation more specifically refers to transforming model source data into engine-readable model files.
Files You Need for an sfmcompile Model
Before troubleshooting tools, understand the file pipeline. Most compilation failures become much easier to diagnose once you know which file controls which part of the model.
| File | Purpose |
|---|---|
.SMD | Mesh, skeleton, or animation source data |
.DMX | More capable Source data-exchange format |
.QC | Text instructions telling the compiler how to build the model |
.MDL | Main compiled model file |
.VVD | Vertex information |
.VTX | Optimized mesh/rendering information |
.PHY | Optional physics/collision information |
.VTF | Source texture |
.VMT | Material definition referencing textures and shader settings |
.VMF | Editable Source map format |
.BSP | Compiled map |
Blender Source Tools supports importing and exporting Source-oriented formats including SMD, VTA, DMX, and QC-related workflows.
SMD and DMX files
SMD has been used for Source models for many years. It can contain mesh, bone, and animation information.
DMX is another Valve data format used for Source content and can retain information that is less convenient to represent through SMD.
If your Blender model is the editable master asset, SMD or DMX is typically the intermediate representation delivered to the model compiler.
The QC file
The QC file is one of the most important pieces of the entire pipeline.
Think of it as the build recipe.
It tells the compiler:
- where the final model should be created
- which reference mesh to use
- where materials are located
- which animation sequences exist
- which surface properties apply
- whether collision geometry should be generated
- how optional model features should behave
A minimal example may resemble:
$modelname "custom/character.mdl"

$body "body" "character.smd"

$cdmaterials "models/custom"

$surfaceprop "flesh"

$sequence "idle" "idle.smd" fps 30
The exact directives required depend on the complexity of the model. A static prop can be very simple. A character containing multiple bodygroups, flexes, attachments, physics, and animation sequences can require a much larger QC.
Tools Commonly Used for sfmcompile
You do not need a huge software stack, but several tools have distinct jobs.
Source Filmmaker
Source Filmmaker is the final environment where you test the compiled content.
It also contains the Source toolchain associated with its installation.
StudioMDL
studiomdl.exe is Valve’s model compiler.
Valve’s documentation identifies StudioMDL as the command-line utility responsible for turning intermediate Source model data into the binary MDL format. It is normally located inside the relevant game’s bin directory.
You can invoke it directly from a terminal or use another program as a graphical front end.
Crowbar
Crowbar is a community utility widely used in Source-model workflows because it provides a more convenient interface for compiling and decompiling models.
Its GitHub project continues to publish releases, and its release history includes compile-related fixes alongside decompilation and Workshop functionality.
Crowbar does not eliminate the need to understand QC files. If your QC paths, material locations, skeleton, or exported data are wrong, a graphical compile button cannot automatically repair them.
Blender
Blender is commonly used for:
- editing meshes
- adjusting UVs
- rigging
- weight painting
- creating shape keys
- preparing animations
- exporting Source-ready intermediate files
Blender Source Tools
Blender Source Tools adds Source Engine import/export capabilities to Blender. Its project describes support for SMD, VTA, DMX, and QC workflows.
This is useful because Blender’s normal FBX or OBJ export is not itself the final classic Source model-compilation step.
Texture tools
Models and materials follow related but separate pipelines.
Source materials traditionally use .VTF texture files combined with .VMT material definitions. The VMT tells the engine which shader and texture paths the material should use.
This separation explains a very common situation:
The model successfully compiles but appears purple and black in SFM.
That usually points toward a material or texture problem rather than a failed model compile.
How to Run an sfmcompile Model Workflow
The most reliable approach is to build and test the asset in stages.
Trying to compile a fully rigged character with dozens of materials, bodygroups, flexes, and sequences on the first attempt makes troubleshooting unnecessarily difficult.
1. Prepare the model
Open the model in Blender or another compatible 3D package.
Check:
- object scale
- transforms
- mesh orientation
- UV mapping
- material assignments
- armature structure
- vertex weights
- bone names
- unnecessary geometry
Apply transformations where appropriate before export.
Pay particular attention to armature scaling. Blender Source Tools itself warns that non-uniform armature scale can produce mesh deformation in Source that differs from what you see inside Blender.
2. Clean the skeleton
For a rigged model, verify that the bones required by the mesh actually exist and have sensible hierarchy relationships.
Common rig problems include:
- renamed bones
- duplicate bones
- unapplied transformations
- vertices assigned to the wrong bones
- unsupported or excessive influences
- animation referencing bones that were removed
If a model compiles successfully but explodes, stretches, or enters a strange pose, inspect the rig before assuming StudioMDL is malfunctioning.
3. Export SMD or DMX
Use your Source-compatible exporter to generate model data.
Depending on your project, you may export:
- reference mesh
- skeleton
- idle animation
- additional sequences
- flex data
- separate body meshes
Keep filenames straightforward.
For example:
character_reference.smd
character_idle.smd
character_walk.smd
character_physics.smd
Avoid repeatedly renaming source files once they are already referenced by the QC.
4. Organize the project
A clean project structure prevents many path-related errors.
For example:
my_character/
├── character.qc
├── character_reference.smd
├── character_idle.smd
└── character_physics.smd
Your final engine files belong in the appropriate SFM game-content paths rather than being mixed randomly with your editable source files.
A typical conceptual structure is:
SourceFilmmaker/
└── game/
    └── usermod/
        ├── models/
        │   └── custom/
        │       └── character/
        └── materials/
            └── models/
                └── custom/
                    └── character/
The model and material paths in your QC and VMT files must agree with this hierarchy.
5. Write the QC
Start with the simplest QC that can successfully load the model.
For example:
$modelname "custom/character/character.mdl"

$body "Body" "character_reference.smd"

$cdmaterials "models/custom/character"

$surfaceprop "flesh"

$sequence "idle" "character_idle.smd" fps 30
Once the basic model works, add advanced features one by one.
This approach is much easier than debugging twenty directives simultaneously.
6. Select the correct game configuration
A compiler needs to know which Source game environment it is targeting.
If you use the wrong game configuration, compilation may succeed against the wrong assets or fail because required paths cannot be resolved.
With classic Source Filmmaker, confirm that the compilation setup points toward the SFM installation and intended game-content directory.
7. Compile with Crowbar or StudioMDL
Using Crowbar, select your QC and the appropriate game configuration, then compile.
Using StudioMDL directly follows the same underlying principle: pass the QC file to the compiler.
A conceptual command is:
studiomdl.exe "path\to\character.qc"Do not judge success purely by whether the compiler window closes.
Read the compile log.
Warnings and errors often tell you exactly which asset, bone, texture reference, or QC instruction is causing trouble.
8. Verify the compiled output
A Source model is not necessarily represented by one isolated file.
Your output may include model-related files such as:
character.mdl
character.vvd
character.dx90.vtx
character.phy
The precise output varies with the model and engine branch.
Do not copy only the .mdl file and discard its companions.
9. Prepare materials
Make sure the material files exist at the path defined by your model.
If your QC contains:
$cdmaterials "models/custom/character"the corresponding material hierarchy must make sense inside SFM’s materials directory.
The VMT also needs to reference its textures correctly.
10. Test the asset in SFM
Open Source Filmmaker and locate the compiled model through its model browser.
Check several things before declaring the compile finished:
- model loads
- textures appear
- bones manipulate correctly
- animation sequences work
- scale is sensible
- normals render correctly
- flexes work if included
- collision behaves as expected if needed
If the model is technically usable but one component is wrong, diagnose that subsystem instead of recompiling everything blindly.
Understanding QC Directives
Learning a handful of QC commands makes sfmcompile dramatically easier.
$modelname
Defines where the compiled model will live relative to the model directory.
$modelname "custom/robot/robot.mdl"$body
Defines a model mesh.
$body "Body" "robot_reference.smd"$cdmaterials
Tells the model where to look for its material files.
$cdmaterials "models/custom/robot"A wrong value here is a frequent cause of missing materials.
$sequence
Creates an animation sequence.
$sequence "idle" "robot_idle.smd" fps 30Characters can contain many sequences, each pointing toward the relevant animation data.
$surfaceprop
Defines the physical surface category associated with the model.
$surfaceprop "metal"$collisionmodel
Defines collision or physics geometry when required.
A project does not need every available QC directive. Use only the features the model actually requires, particularly while debugging.
sfmcompile Errors and What They Usually Mean
Compilation problems tend to fall into a few repeatable categories.
Model does not appear in SFM
First check the $modelname output path.
Then verify that all compiled files actually reached the intended models directory.
Also make sure you are searching the correct content path inside SFM.
A successful compile does not guarantee that you are looking in the correct folder afterward.
Purple-and-black checkerboard textures
This is one of the most recognizable Source-engine problems.
It usually indicates a missing or incorrectly referenced material or texture.
Check:
$cdmaterialsin the QC- material directory structure
- VMT filenames
- texture path inside each VMT
- VTF filename
- material name assigned to the mesh
Do not immediately rebuild the rig. A checkerboard model can have perfectly valid geometry and bones while its material references are broken.
Model is invisible
An invisible asset can have several causes:
- wrong output location
- missing companion model files
- invalid mesh
- scale far too small
- incorrect material
- bad transforms
- compilation failure hidden earlier in the log
Start by reading the compiler output instead of repeatedly exporting the same model.
Model appears in a T-pose
A T-pose generally means the mesh exists but the animation or sequence setup is not working as expected.
Inspect:
- sequence definitions
- animation SMD/DMX
- skeleton consistency
- bone names
- animation export range
- FPS
- armature used during export
A successful geometry compile does not prove that your animation pipeline is correct.
Mesh becomes distorted
If the model stretches or collapses, examine:
- vertex weights
- armature scale
- bone hierarchy
- transforms
- exported skeleton
- unmatched bone names
Fixing weight painting or the armature is often more useful than changing compiler settings.
Compiler cannot find a file
This usually means the QC references a path or filename that does not exist from the compiler’s perspective.
Check spelling carefully.
For example, if the QC says:
$body "Body" "character_ref.smd"but the actual file is:
character_reference.smdthe compiler cannot infer what you intended.
Model works but materials are assigned incorrectly
If different parts of the model receive the wrong texture, inspect the material names assigned before SMD/DMX export.
A mesh’s Source material references originate earlier in the asset pipeline than many beginners expect.
SFM Model Compilation vs Map Compilation
Model compilation and map compilation serve different purposes.
For models:
SMD / DMX + QC
      ↓
  StudioMDL
      ↓
MDL / VVD / VTX / PHY
For classic Source maps:
VMF
 ↓
VBSP
 ↓
VVIS
 ↓
VRAD
 ↓
BSP
VBSP handles the map’s basic compiled geometry, VVIS processes visibility information, and VRAD handles lighting calculations.
That final .BSP is the format loaded by Source-engine applications.
If your problem concerns an imported character, editing map compile options will not solve it. Likewise, changing a model’s QC will not repair incorrect map lighting.
Is Rendering a Movie the Same as sfmcompile?
Not exactly.
Source Filmmaker also has an output process for creating finished animation footage, and some community articles loosely describe that as “compiling” a scene. Search results for SFM compile therefore sometimes mix model compilation, map building, and final rendering.
For technical troubleshooting, keep the terms separate:
| Process | Input | Typical Output |
| Model compilation | SMD/DMX + QC | MDL-related model files |
| Texture preparation | source image/material data | VTF + VMT |
| Map compilation | VMF | BSP |
| Animation rendering | SFM session | image sequence/video |
This vocabulary makes tutorials, documentation, and error searches much easier to interpret.
Crowbar vs StudioMDL for sfmcompile
Crowbar and StudioMDL are not really competing model formats or separate pipelines.
StudioMDL performs the underlying model compilation.
Crowbar provides a convenient interface around Source model-related operations.
| Feature | StudioMDL | Crowbar |
| Valve model compiler | Yes | Uses configured Source tools |
| Command-line workflow | Yes | Not required for normal use |
| GUI | No | Yes |
| QC compilation | Yes | Yes |
| Decompilation workflow | No | Yes |
| Beginner-friendly | Moderate | Generally easier |
| Compile log access | Yes | Yes |
If you are learning the workflow, Crowbar can reduce friction.
If you are debugging unusual build behavior, understanding what StudioMDL does underneath remains valuable.
A Better Troubleshooting Method
Randomly changing settings is the slowest way to fix Source models.
Use a controlled process instead.
Step 1: Reduce the model
Compile only:
- one mesh
- one material
- one skeleton
- one idle sequence
If that works, your core setup is valid.
Step 2: Add features gradually
Add one feature at a time:
- additional materials
- animations
- bodygroups
- physics
- attachments
- flexes
- other advanced QC logic
Compile after every meaningful change.
When something breaks, you immediately know which addition introduced the problem.
Step 3: Read the first meaningful error
A compile log can generate several messages after one underlying failure.
Fix the earliest meaningful problem first.
Later errors may simply be consequences of it.
Step 4: Separate model problems from material problems
Ask one question:
Is the geometry itself loading?
If yes, and only the textures are wrong, focus on VMT/VTF and material paths.
If no geometry appears, start with the QC, model output, SMD/DMX export, and compile log.
Step 5: Keep a known-good test model
A tiny working prop is extremely useful.
If your test model still compiles but your new character does not, your compiler installation is probably not the main problem.
That immediately narrows the search to the project files.
Quick Takeaway: Build the simplest working version first. Successful Source workflows are much easier to extend than broken complex models are to debug.
Common sfmcompile Mistakes Beginners Should Avoid
Several mistakes repeatedly create unnecessary debugging work.
Treating FBX as the final Source file
FBX may be useful during asset transfer between 3D applications, but classic Source model compilation normally relies on Source-compatible intermediate data such as SMD or DMX plus QC instructions.
Editing everything at once
Changing bones, materials, QC paths, exporter options, and compiler configuration simultaneously destroys your ability to identify the actual cause of a problem.
Change one variable at a time.
Ignoring the compilation log
The log is not background noise.
It is one of your most useful diagnostic tools.
Read errors and warnings before searching forums or reinstalling software.
Using inconsistent folder paths
Decide on a clean namespace such as:
models/myproject/character/
materials/models/myproject/character/
and maintain it consistently.
Clean paths become increasingly valuable as your asset library grows.
Copying only the MDL
A compiled Source model may rely on companion model files.
Keep the generated package together.
Testing an advanced character first
Your first successful compile should ideally be a simple object.
A static prop removes most rigging and animation variables, making the pipeline much easier to understand.
A Reliable sfmcompile Checklist
Before compiling:
- Confirm the mesh looks correct in Blender.
- Apply appropriate transformations.
- Check armature and vertex weights.
- Verify material assignments.
- Export valid SMD or DMX files.
- Confirm filenames match the QC exactly.
- Set
$modelnamecorrectly. - Check
$cdmaterials. - Use the correct Source Filmmaker game configuration.
- Compile and read the complete log.
After compiling:
- Confirm the model output exists.
- Keep MDL companion files together.
- Verify VMT and VTF locations.
- Load the model in SFM.
- Inspect scale and orientation.
- Test bones and animation.
- Check materials.
- Add advanced features only after the base model works.
What Actually Makes sfmcompile Reliable
The hardest part of Source Filmmaker compilation is rarely clicking the Compile button.
The real skill is understanding the chain of dependencies.
Your model starts as editable geometry and rig data. SMD or DMX carries that information into the Source pipeline. The QC explains how those pieces should be assembled. StudioMDL produces the binary model data. Material files point toward textures. Finally, Source Filmmaker loads everything through its game-content paths.
If one link fails, the symptom often tells you which part to inspect:
- compiler error: QC or source-data problem
- missing model: compile/output path problem
- checkerboard: material or texture problem
- distorted mesh: rig or weight problem
- T-pose: animation or sequence problem
- broken map: separate map-compilation problem
Once those layers are treated independently, troubleshooting becomes much more predictable.
Final Thoughts on sfmcompile
sfmcompile is best understood as a workflow rather than a mysterious standalone button. For classic Source Filmmaker model work, the essential path is straightforward: prepare the asset, export SMD or DMX data, define the build through a QC file, compile it with StudioMDL or a Crowbar-based workflow, place the generated files correctly, and test them inside SFM.
Valve’s documentation confirms StudioMDL’s role as the Source model compiler, while current Blender Source Tools resources continue to support the Source-oriented SMD, DMX, VTA, and QC ecosystem used in these workflows.
For your next custom asset, start with a stripped-down model and a minimal QC. Get that version compiling cleanly first. Then add materials, animations, physics, flexes, and advanced features one at a time. That method turns sfmcompile from trial-and-error into a repeatable production process.
